Blogathon Canada – Winner

I’m back to announce the winner of the Kona bundle. But first, I would like to thank everyone who came to visit my blog and took the time to write a comment. It was great to read all your nice words. I also really enjoyed visiting different blogs through out Canada.
So, the winner is comment 71 that was written by Margaret. Congratulations! 

Thanks to Sew Sisters for organizing Blogathon Canada and for all the giveaways!

Blogathon Canada – Day 5: Quebec and Territories

Welcome to my stop for Blogathon Canada. I’m the host for Quebec. My co-hoster today is Janet from Caribou Crossing Chronicles. She is hosting for the Territories. Be sure to stop by her blog too!

For those of you who are new to my blog, welcome! I hope you’ll enjoy exploring the different projects I’ve shared here. I’ll start by introducing my-self. I come from an engineering background, but I’ve always been a crafty person in my free time. I think this is a great combination for quilting and sewing in general, as both require some logic and creativity. I started sewing when I got my first apartment, mainly doing home decor projects. I would say I got into sewing and quilting more seriously after becoming a mom, about 5 years ago. As I wanted to make projects for my little ones, I discovered modern prints as well as an amazing online quilting community. I love creating and designing projects of my own. For me, quilting and patchwork projects are a great way to express my creativity. I have published (see my Tutorials and Patterns) several projects in different magazines, and I’m the co-founder and current vice-president of the Montreal Modern Quilt Guild.

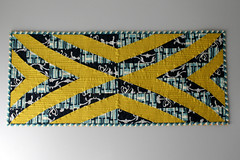
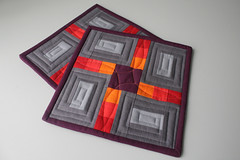
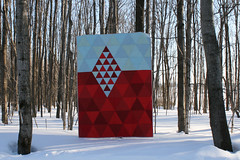
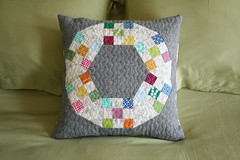
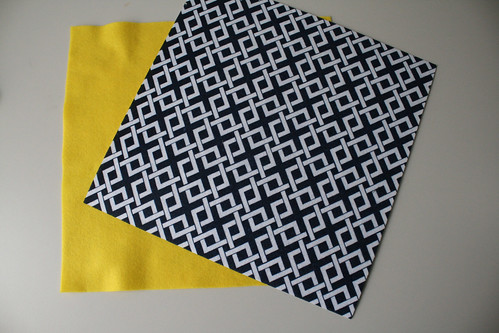
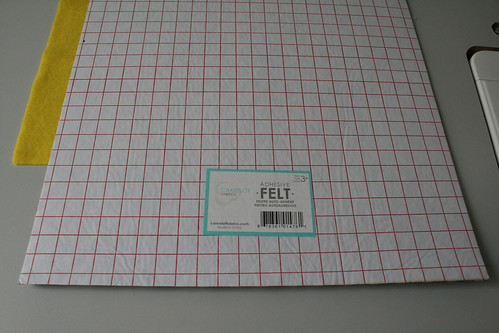
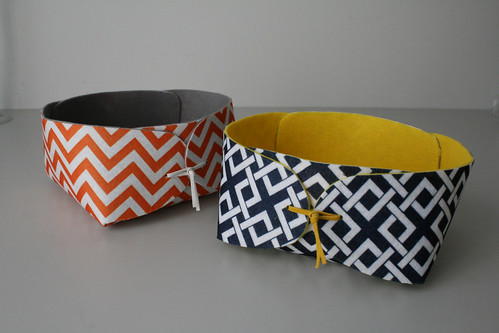
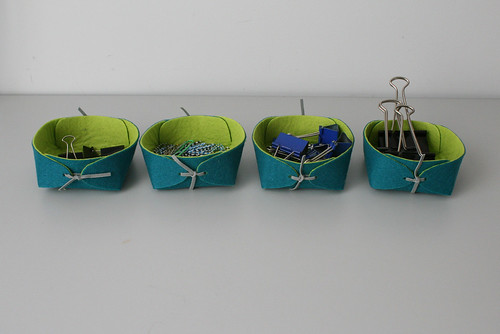
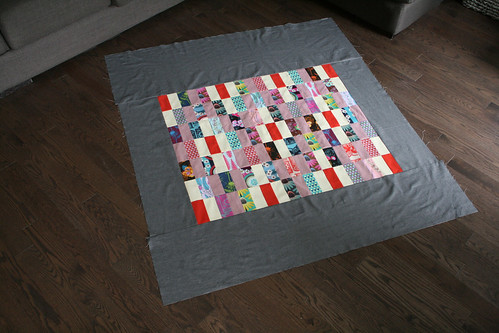
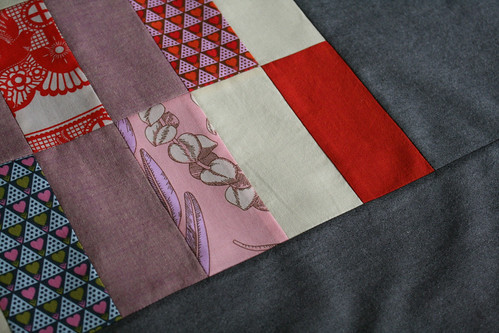
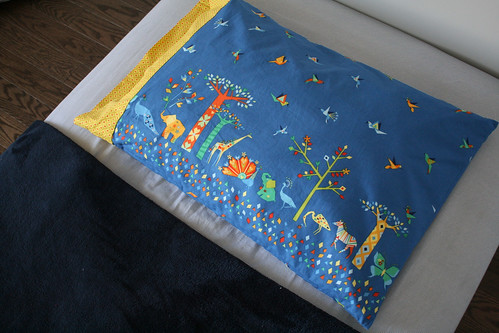
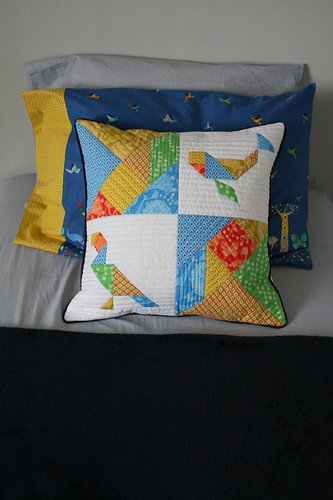
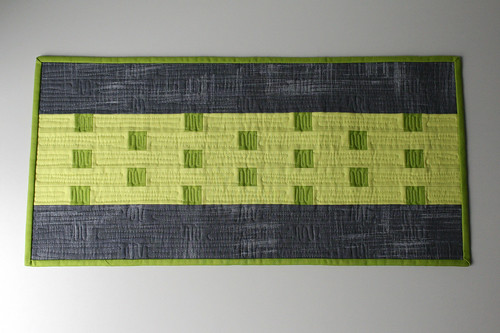
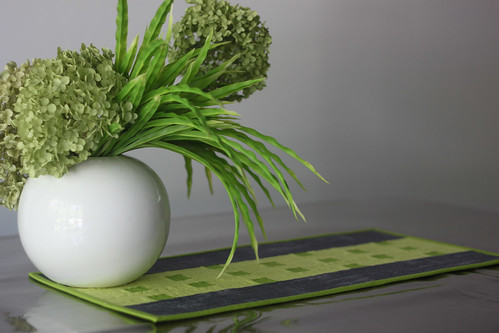
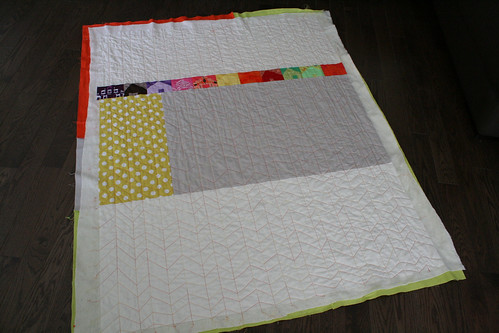
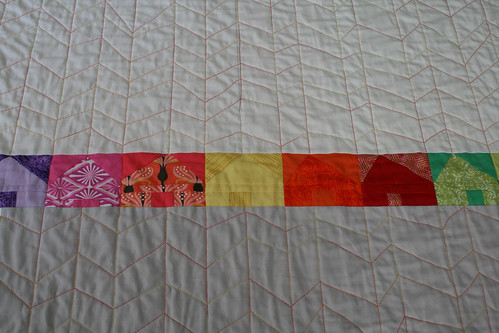
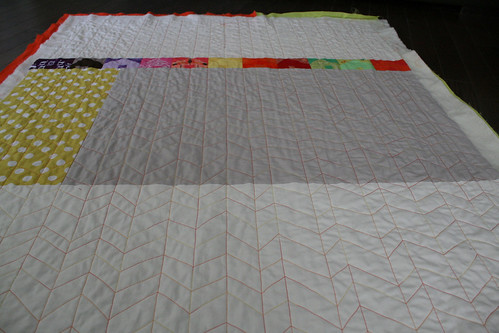
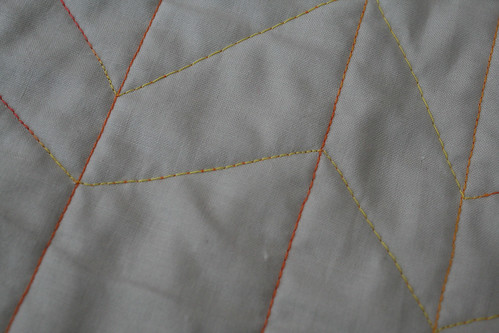
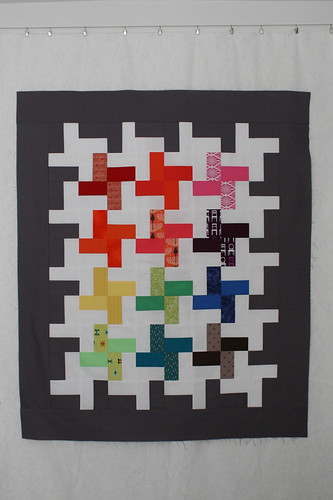
Here are a few pictures of my projects that I find representative of my style:

HRT_Finished
Petals Patchwork Pot Holders
Gear Pillow

Reflection Mini Quilt
Amalgam Quilt
Jack's Chain Pillow

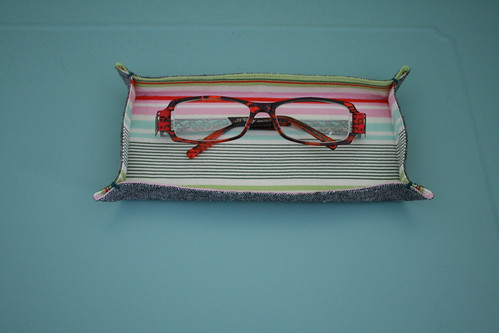
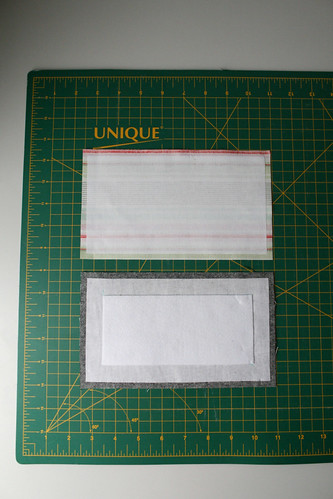
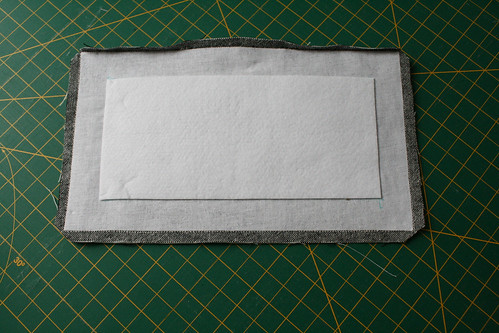
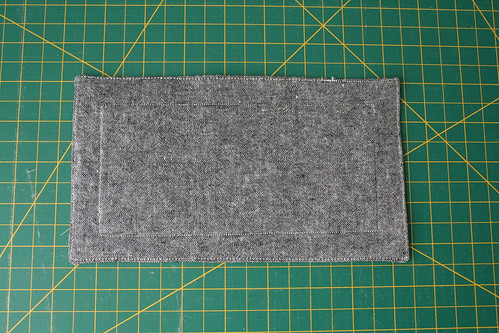
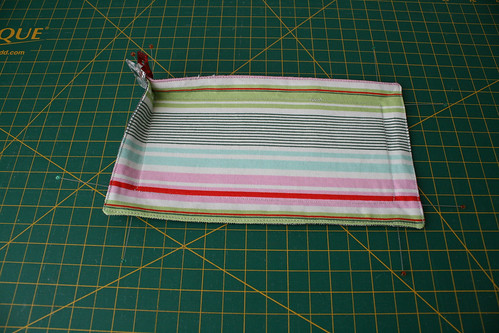
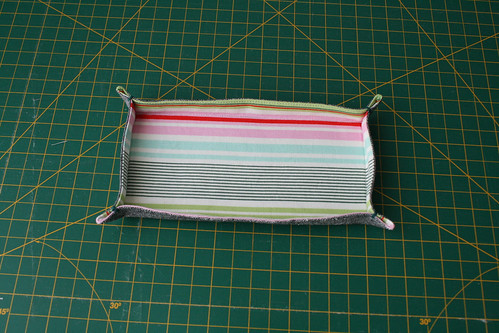
I thought I would be great to share a small project with you today. But since this post is already quite long, I decided to write it in a separate post. It’s a fabric tray I’ve made for my eyeglasses. I hope you’ll like it!

Eyeglasses Tray

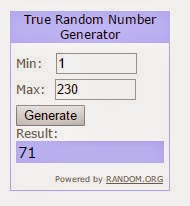
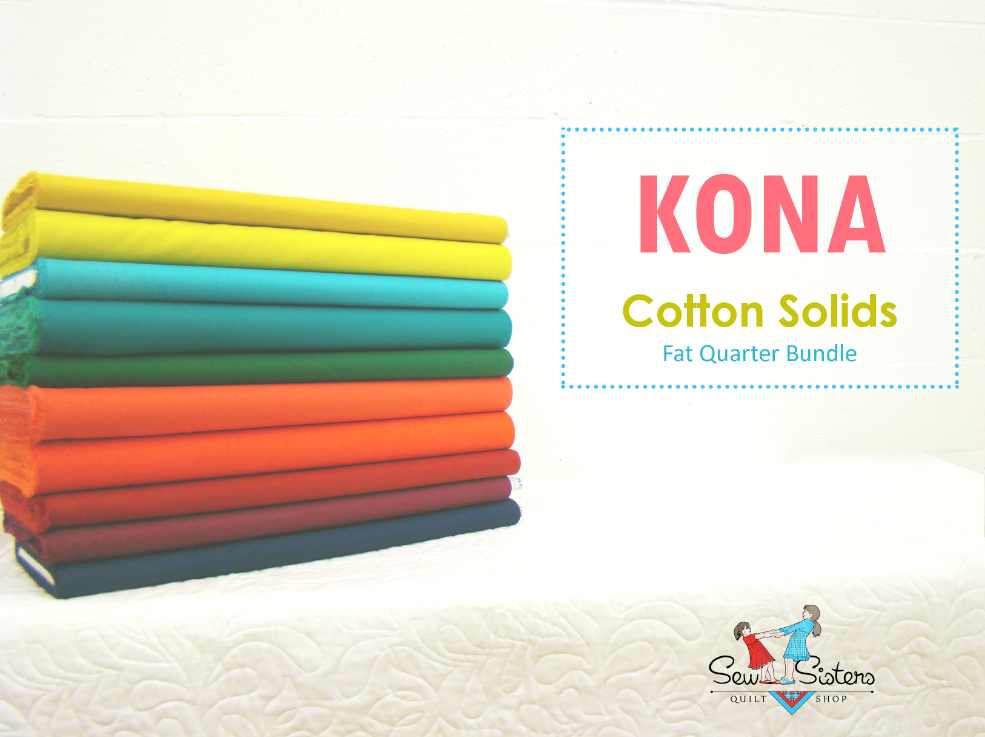
Now to the fun part, a giveaway generously provided by Sew Sisters! The winner will get a Fat Quarter bundle of some of my favorites Kona Cotton Solid colors.

To participate, just leave a comment on this post. The giveaway is open to International participants. You have until November 23 to participate. I’ll announce the winner on the 24. If you are a no-reply blogger or don’t have a blog account, please leave your email in the comment (otherwise I’ll have to pick another winner).

Update: The winner of the eBook is Margaret.

Be sure to stop by the Sew Sisters Blog, there is also a giveaway sponsored by Timeless Treasures today.

If you didn’t have time to see the other stops of  Blogathon Canada, take note that all giveaways are open until November 23. So, there is still time to enter other giveaways. You’ll find the list of hosts here.

Blogathon Canada is also and more importantly about getting to know other bloggers sharing the same passion from all over the country. Let me introduce you to some bloggers from Quebec. Some I know, because they are friends and members of the Montreal MQG. Others, I’m discovering them my-self.

I hope you are enjoying Blogathon Canada!

Eyeglasses Tray

I love trays of all sorts and I’ve been wanting to sew one for my eyeglasses lately. I got a new nightstand at Ikea. It’s made out of steel and I thought it would preferable to lay my eyeglasses on something a bit more soft while I sleep. So, why not a fabric tray?

Eyeglasses Tray

I thought I would share with you how I did it. It could make some nice and quick gifts. This is much inspired by the fabric tray tutorial from Noodlehead. Here is the different pieces of fabric and interfacing I cut. I used woven fusible interfacing (like Pellon Shape-Flex 101) on the exterior fabric and the lining for the tray to hold better its shape. And I used some stiff interfacing for the tray bottom.

  • Exterior fabric (shown here: yarn-dyed Essex linen in black): 5″ x 8.5″
  • Lining (shown here: strip print from the Nicey Jane collection by Heather Bailey): 
  • 2 pieces of woven fusible interfacing: 4.5″ x 8″
  • 1 piece of stiff fusible interfacing: 3″ x 6″

The image below shows how I fused the different pieces of interfacing. The piece of stiff interfacing was fused to exterior fabric after the woven fusible interfacing.

Eyeglasses Tray

After that, I sewed the lining and exterior fabric right sides togethere leaving an opening for turning inside out. I sewed just next to the woven fusible interfacing leaving a 1/4″ seam allowance on each side. I clipped the corners before turning the tray right sides out. I pushed out the corners, pressed the tray and closed the opening using a whipstitch.

Eyeglasses Tray

I top-stitched the tray close to the edges, and then with the needle just next to the stiff interfacing to delimit the tray bottom.

Eyeglasses Tray

To finish the tray, I stitched all four corners with some embroidery floss.

Eyeglasses Tray

Eyeglasses Tray

Et voilà! a nice fabric tray for my eyeglasses.

Felt Baskets

The other day I went to a local fabric shop and found some printed craft felt (by Camelot Fabrics). You can buy them adhesive or not.

Felt baskets

Felt baskets

It’s the first time I was seeing printed felt. I love fabric trays of all sorts and I thought it would be great to make some with those. So, I bought a few and when I came back home I looked on Pinterest for some ideas. Just look for “felt basket” (or bowl, box, tray, organizer) on Pinterest and you’ll find plenty of ideas. I found my inspiration in the felt organizers from Skandinavious Etsy shop.

I first started by making some baskets for my sons for them to store their little treasures. I made a paper template and started cutting and assembling them. With the adhesive felts, it was easy to use a different color inside.

Felt baskets

This is a fun no-sew project. After that, I made my-self some smaller trays to put on my desk with 2 solid color felt pieces instead.

Felt baskets

I love those ones, but I think I prefer the wool felt and leather versions from the Skandinavious Etsy shop. I think her boxes really standout by her use of quality material. I might decide to order 1 or 2 for Christmas gifts.

Blogathon Canada 2014

Sew Sisters is hosting Blogathon Canada for the the third time this year (November 17-22). Last year, I participated through Dizzy Quilts blog. This year I’ll be the host for Quebec.

 Blogathon Canada 2014

Sew Sisters is a Canadian online quilt shop. They also have a local store in Toronto. Learn more about them here. And what is Blogathon Canada all about? Each day host bloggers will introduce themselves and their work on their blogs. They will include links to more blogs from their province so you can visit those blogs as well. The host bloggers will also host a giveaway of some of their favorite goodies from Sew Sisters store so you’ll have a chance to win every day of the week!

Sew Sisters are also going to have sponsored giveaways on their blog during the week. The Sponsors are Robert Kaufman Fabrics, Aurifil, Northcott, Timeless Treasures and Camelot Fabrics.

 Robert Kaufman Fabrics

 Aurifil
 Northcott

If you would like for the host blogger from your province or territory to link your blog in her post please write to Sew Sisters at:  connect@sew-sisters.com and they will add your blog to the list. Please note that you need to be a blogger living in Canada and your blog should have posts about quilting or crafting to be eligible.

You’ll find below the hosts schedule. So, I’ll be back on November 21st with my Blogathon post and a giveaway.

The Hosts:

Monday, November 17 BC Stacey Stacey in Stitches
Monday, November 17 BC Jessica Momiji Studio
Tuesday, November 18 Maritimes Linda Scrapmaster
Tuesday, November 18 Maritimes Linda Stitch Lines
Wednesday, November 19 AB Kelsey Everyday Fray
Wednesday, November 19 AB Leanne She Can Quilt
Thursday, November 20 SK Heather Peace.Love.Quilt
Thursday, November 20 MB Lori Night Owl Quilting
Friday, November 21 QC Josée The Charming Needle
Friday, November 21 Territories Janet Caribou Crossing Chronicles
Saturday, November 22 ON Lorna  Sew Fresh Quilts
Saturday, November 22 ON Sandy Upstairs Hobby Room

Pretty Potent Charm Quilt

This summer I bought a charm pack from Anna Maria Horner’s Pretty Potent collection. I was looking for a pattern that would work well with a charm pack. I found my inspiration in this rug. I just completed my quilt top last week.

Pretty Potent quilt top

I’ve been meaning to share this project before, but I never got to it. The patchwork section is 38″ x 31.5″. I’ve used 28 of the 30 charm squares from the pack. I’ve sliced them into two 2.5″ x 5″ pieces. I’ve combined them with solid color pieces of the same size. The fabrics I’ve used for those are: Shot cottons by Kaffe Fasset in Mushroom and in Persimmon, and Kona cotton in Butter. Here is how many 2.5″ x 5″ pieces of each you would need to make the same layout: 11 in Persimmon, 32 in Butter and 34 in Mushroom.

Pretty Potent quilt top

For the background, I’ve used Interweave Chambray in Pepper from Robert Kaufman. It’s the first time, I use it. It is similar to shot cotton but slightly heavier and with a tighter weave (I got it from Imagine Gnats). Here is a close-up on the different fabrics.

Pretty Potent quilt top

This is more prints than what I usually work with. I’m still unsure of the effect. I love the combination of colors. But, I think the Mushroom fabric might not be contrasting enough with the prints to see the layout.

Or maybe I’ve been looking at it too much and I need some time to step back. So, I won’t quilt it right away. Anyway, I have plenty of things waiting to be quilted. One of which is my Pinwheel quilt. The other is a quilting sampler I’ve started this project in a workshop with Michèle-Renée Charbonneau from Quilt Matters. This was a workshop we had this weekend with the Montreal Modern Quilt Guild. MR showed us how to make a modern FMQ sampler using different quilting motifs and a quilt-as-you-go technique to assemble the blocks. It was a great workshop and I really enjoyed my day. Unfortunately, I have no pictures to show you. But, I’ll share it with you as soon as I make some progress.

Umbrellas Contest at Spoonflower

Have you been following the Design of the Week contests at Spoonflower? This week’s theme is Umbrellas. As I was working on an umbrella design for a personal project of mine, I decided to participate. Here are my Umbrellas from Above:

Umbrella from Above

I wanted to have a hand-drawn feeling to it and create secondary designs by illustrating the umbrellas as hexagons. What do you think?

There is still time to vote. If you go take a look you’ll see that there is quite a few beautiful and original designs!

Origami Oasis

Have you seen the new fabric collection by Tamara Kate: Origami Oasis for Michael Miller Fabrics? I just lover her designs! In the past weeks, Tamara has shared a number of projects made with her collection. Some amazing projects! Also, check out the Michael Miller blog for a giveaway.

Both me and Tamara are members of the Montreal Modern Quilt Guild. I was so glad when she contacted me this summer to ask if I could make a project with her new collection.Today, it’s my turn to share what I’ve done with you. I made a pillow case and a quilted pillow cover. Head on over at the MM blog to read more about them. You’ll also find a link to the paper piecing templates I’ve prepared for the pillow cover. If you are coming from there, I thank you for stopping by my blog and I hope you’ll enjoy my projects.

Tangram Pillow 
Tangram Pillow 

Thanks Tamara for giving me the opportunity to sew with your beautiful fabrics!

Selfish Sewing Week Event

Today, I’m inviting you over at the Selfish Sewing Week event hosted by Imagine Gnats and Kollabora. If you are coming from there, I thank you for stopping by my blog and I hope you’ll enjoy my projects.

Rachael from Imagine Gnats contacted me earlier this summer to ask if I would like to contribute with a quilted project. I was happy to accept to write a tutorial for her readers and for you. Most projects featured during the week are garments, but I hope my tutorial will inspire some to make patchwork projects for themselves.

Weave Table Runner

Weave Table Runner

It’s not exactly a selfish project as I made it for my mother. But, I hope it will inspire you to make one just for YOU! See this post for the complete list of featured stitchers and some giveaways!

Herringbone Quilting

Earlier this summer, I’ve shown you a WIP quilt top made with a rainbow charm pack (see this post). I had mentioned I had to make the quilting for a quilt designed and pieced by my friend Cinzia using the same charm pack. I finished the quilting and gave it back to her last week. Before I did, I took a few pictures to share with you.

Herringbone Quilting

Cinzia pieced improvisational houses. I love the cream, grey and yellow dots she used for the negative space. I love how different the rainbow of colors looks with those compared to how it looks with the cool gray and pure white I’ve used.

A while ago I had seen a whole cloth quilt from West Elm on Pinterest (see this pin). It features a herringbone pattern for the quilting and I really like the idea. When I saw Cinzia’s quilt, I thought it would be perfect to quilt this in the negative space. Herringbone patterns can look like a series of rooftop or tiles. I decided to go improvisational just like the piecing of the houses. I first quilted some vertical lines using my walking foot. I aligned those lines with the edges of the house blocks and with the top of the roofs. Then I switched to my darning foot to free motion quilt the zig zag lines going from a vertical line to the other.

Herringbone Quilting

Cinzia provided me a yellow and orange variegated thread for the quilting. A contrasting thread makes the quilting errors more obvious. Using a variegated thread adds an additional difficulty. I had a hard time adjusting the thread tension. I wasn’t able to completely eliminate the thread loops from the bobbin from showing up on the front. This was more evident when the thread on the front changed to a different color than the one on the back.

Herringbone Quilting

Still, I hope my friend Cinzia is happy with the result and I’m looking forward seeing the quilt finished. As for my quilt, I though I’d share the finished quilt top. It really hasn’t change much since the last picture, but the piecing is done. I’m still unsure how I’ll quilt it. Either a large spiral or something that will accentuate the two levels of pinwheels.

Pinwheel Quilt

Both these quilts are meant to be donated by the Montreal MQG to a palliative care center. I hope they will bring comfort to the persons who will receive them.