When Rachel Hauser from Stitched in Color announced that she would be giving an online sewing class on curves, I thought this was a great opportunity to learn something new. I registered right away. I love reading her blog. It is filled with information and inspiration. So, I thought that I couldn’t go wrong and I wasn’t disappointed. I decided to take this class to open up my possibilities. It’s not the first time I sew curves, however I had never done curve piecing before this class. I really appreciated the format. Being an online class and being able to choose from different options depending on your needs and budget was great for me. I chose the first option which was a blog only class. This class format really suited me. Not being in an actual class, it gave me freedom on the projects and on the time do the learning and projects.
So, here are a couple of pictures of my projects. For the first week, I decided to do the scallop bunting project. It was a great quick project to learn cutting curves with my rotary cutter. This was something I never tried before, so I was a bit worried. But, it went pretty smoothly.
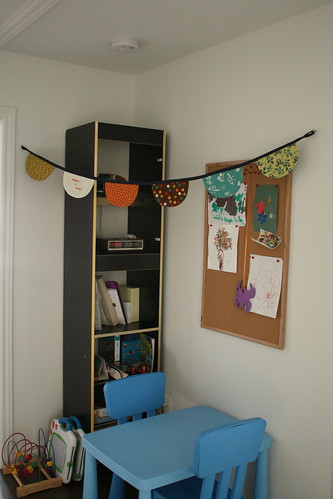
Also, this project was great one to make a little something for the boys. I added a personal touch to the project and embroidered their names on one of the bunting.
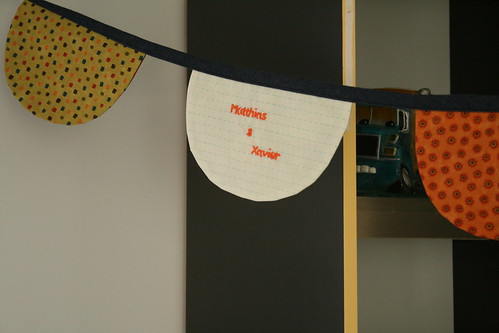
I gave them on Valentines day and they were quite happy.
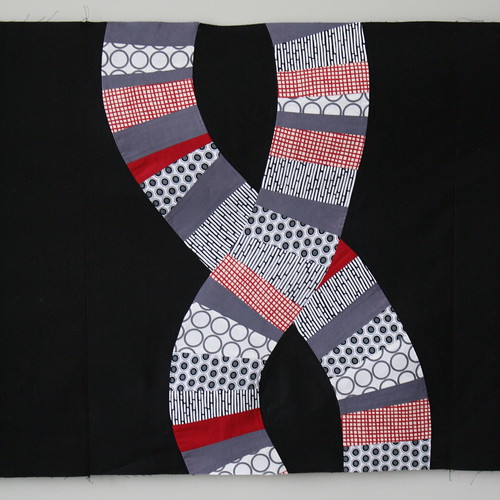
The second week was on improv curves. I loved Rachel’s Rainbow Road project. I remembered my sister asking me to do a quilted cover for her boyfriend’s electronic piano in black, grey, white and red. So, I showed her Rachel’s project to see if she like the style. And I went from there and modified it a bit to have two curves crossing each other. It was improvisational after all… Yesterday, my sister and her boyfriend were here for lunch. So, I showed them the quilt top. They were quite happy. It’s their hand holding it in the picture below.

I really loved doing improv curve piecing. It is very liberating to use the rotary cutter without a ruler and to do the piecing without following a template. Here is a little close-up. As you can see I wasn’t able to remove all the puckering, but it does lie quit flat. Not too bad for the first time. My curves were probably too tights.
The class is finishing next week. Still, I’m presenting my projects to you right away, because I don’t intend to do any of this week and next week projects. Not because they are not interesting, but because I feel I had a good taste of what I can do with curves and now I really want to go back to all the projects I have in my mind. The list is quite long… Thanks a lot Rachel for this class. I really enjoyed from reading all your tips and tricks. I will definitely go back to those curves sometime.
You're very welcome, Josee! I'm so glad that you got what you wanted out of the class. Thanks for sharing!