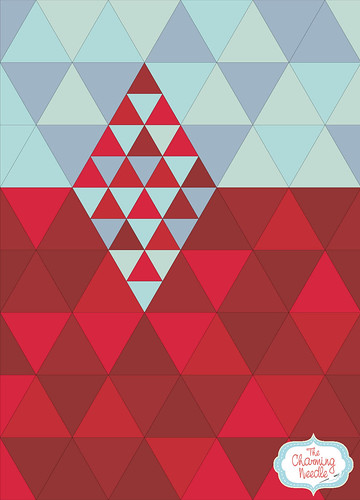
I’m finally back to this project. I’m still not sure how to name this quilt. A friend suggested I Want to Break Free as the song by Queen. Or maybe Connect. Since I’m not sure yet, it will remain In and Out quilt for now.
- Cut from the blue fabrics:
- 23 large triangles
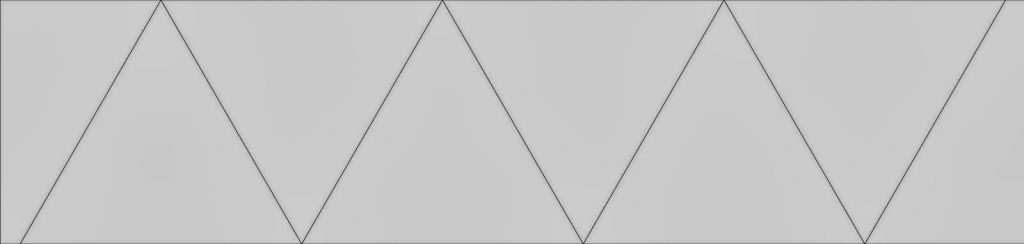
- 6 large half-triangles for the borders
- 16 small triangles
- Cut from the red fabrics:
- 41 large triangles
- 10 large half-triangles for the borders
- 16 small triangles
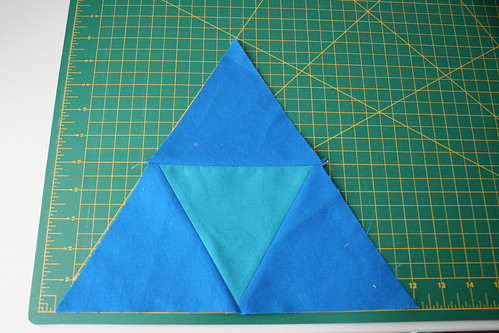
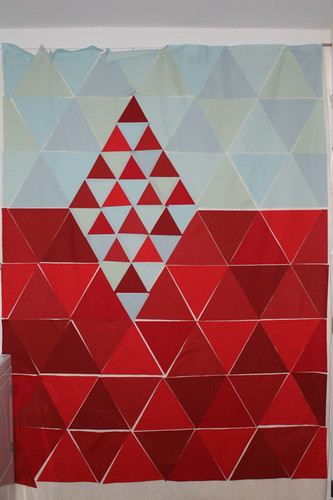
I will be piecing the smaller triangles in groups of 4 to form a triangle of the same size as the larger ones. This way, I’ll be able to piece all my triangles in rows and then piece the rows together to form the quilt top. At first, I thought I would paper-piece the smaller triangles for accuracy. Then I thought about the contrasting colors and I was afraid that the red seam allowances would show up through the light blue fabrics. So, I decided to rely on my precision instead of paper piecing. This way I could press my seam allowances open for the small triangles. I made a test with some fabric scraps and it turned out good enough. I’m just sharing my thoughts here because I would have cut my triangles from larger strips for paper piecing.
Back to the actual cutting, I was able to cut 6 large triangles and 2 half-triangles from one strip of 10″ x WOF (width of fabric). My fabrics were 42″ wide.

So, I needed 7 strips to cut all of my large red triangles and 4 strips for the blue ones. If you go back to my original post, you’ll see that I had 4 red fabrics and 3 blue fabrics. I decided to add one to each color, respectively Kona cottons in Cayenne and Dusty Blue. I might say that it was to add variety. But, the real reason is that I realized I wouldn’t have enough fabric when I started cutting. I only had ordered half a yard of each color. Fortunately, I was able to find some coordinating colors at a local fabric store. For the small triangles, half of a strip (WOF/2) from each color was long enough to cut everything I needed.
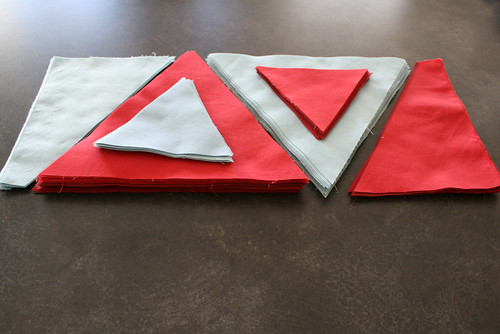
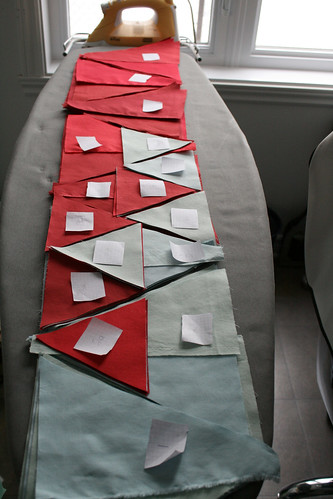
After cutting all my strips, I sprayed them with starch, waited for them to dry and ironed them. This was to minimize stretching when piecing on the bias. I was then ready to cut my triangles. Here they are all stacked up after I was done with the cutting.
Then I decided on my final layout by placing them on my design wall. I was trying to be as random as possible, but still avoiding triangles of the same color next to each other.
When I was satisfied, I stacked them up again but this time row by row to have them ready to sew.
In the next post, I’ll show you my progress on piecing. By then, I may have finished piecing the quilt top!
It's going to be gorgeous! Thanks for sharing your progress!
I love the way everything you do is so orderly! I think your quilt is going to be great.
Ooh, it's looking fabulous!
I really like the design. It is definitely bright and graphic.
Thanks a lot Michele!